My Home Garden: From seed to supper, cultivating your own edible paradise is more rewarding than you might think! This guide dives deep into planning, planting, maintaining, and harvesting your own thriving home garden, whether you’re a seasoned gardener or just starting out. We’ll cover everything from designing the perfect layout for your space to dealing with pesky pests and preserving your bountiful harvest.
Get ready to dig in!
Whether you dream of juicy tomatoes bursting with flavor, vibrant flowers attracting buzzing bees, or a simple herb garden to spice up your meals, this comprehensive guide provides the knowledge and inspiration to transform your outdoor space into a productive and beautiful haven. We’ll explore various gardening styles, plant selection tips, and practical maintenance techniques to ensure a successful and enjoyable gardening journey.
Let’s create your dream garden, one step at a time!
Planning My Home Garden
Starting your own home garden is a rewarding experience, offering fresh produce and beautiful blooms. Careful planning is key to a successful and enjoyable gardening journey. This guide will walk you through designing a small garden layout, creating a planting schedule, and exploring different gardening styles perfect for your space.
Designing a Small Home Garden Layout
A well-designed layout maximizes space and ensures easy access to your plants. Consider sunlight exposure, water access, and your personal preferences when planning. The following table provides a sample layout for a small garden incorporating both vegetables and flowers. Remember to adjust quantities and locations based on your specific needs and available space.
My home garden is my pride and joy, a vibrant ecosystem bursting with life. However, maintaining its health requires vigilance, especially when dealing with unwanted guests. That’s why I always rely on effective strategies, often finding helpful resources like this guide on home-garden pest-control to keep everything thriving. With the right approach, my garden continues to flourish, rewarding me with beautiful blooms and delicious harvests.
| Plant Type | Quantity | Location | Planting Date |
|---|---|---|---|
| Tomatoes | 3 | Sunny, south-facing area | Mid-April |
| Lettuce | 6 | Partially shaded area | Early April |
| Zucchini | 2 | Sunny, well-drained area | Mid-April |
| Sunflowers | 4 | Sunny border | Early May |
| Marigolds | 10 | Around vegetable patch (pest control) | Early May |
Creating a Spring Garden Planting Schedule
Timing is crucial for successful gardening. This schedule Artikels planting times and spacing for common spring vegetables. Remember to check your local frost dates before planting.
Successful spring gardening relies on precise timing and spacing. Here’s a sample schedule for a few common vegetables:
| Vegetable | Planting Time (approx.) | Spacing (inches) |
|---|---|---|
| Lettuce | Early April | 12 |
| Radishes | Early April | 1 |
| Carrots | Mid-April | 2-3 |
| Peas | Mid-April | 4-6 |
| Tomatoes | Mid-May (after last frost) | 24-36 |
Different Gardening Styles for Home Gardens
Several gardening styles cater to different spaces and preferences. Choosing the right style optimizes your garden’s potential.
Various gardening methods can be adapted to suit different spaces and preferences. Consider these options:
Container Gardening: This is ideal for small spaces or balconies. Use pots, hanging baskets, or window boxes to grow herbs, flowers, and even some vegetables like tomatoes and peppers. For example, a collection of terracotta pots on a sunny patio could house a thriving basil plant, colorful petunias, and a compact cherry tomato variety.
Vertical Gardening: Maximize vertical space by using trellises, walls, or hanging planters. This is excellent for climbing plants like beans, cucumbers, and peas, as well as trailing plants such as strawberries. Imagine a vibrant wall of climbing roses or a vertical herb garden neatly organized on a trellis near the kitchen.
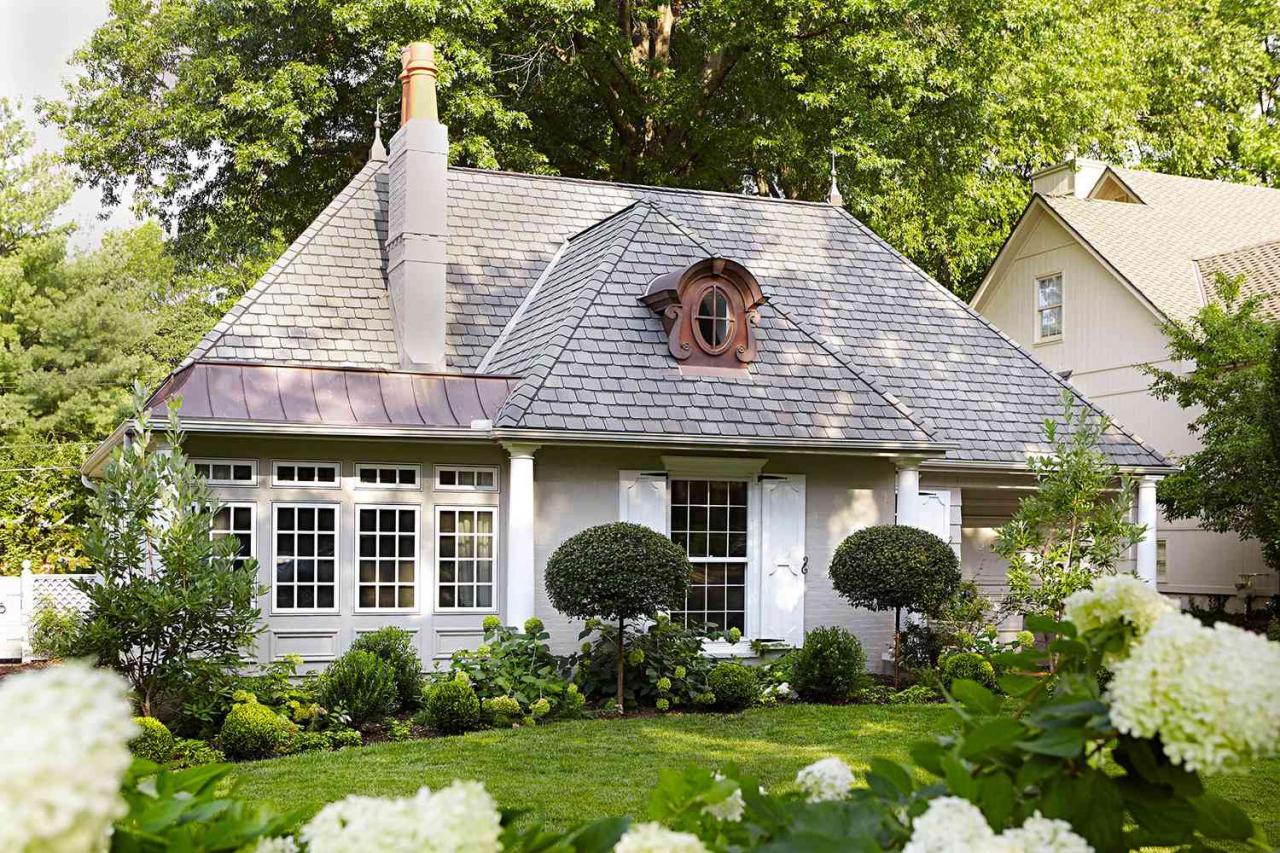
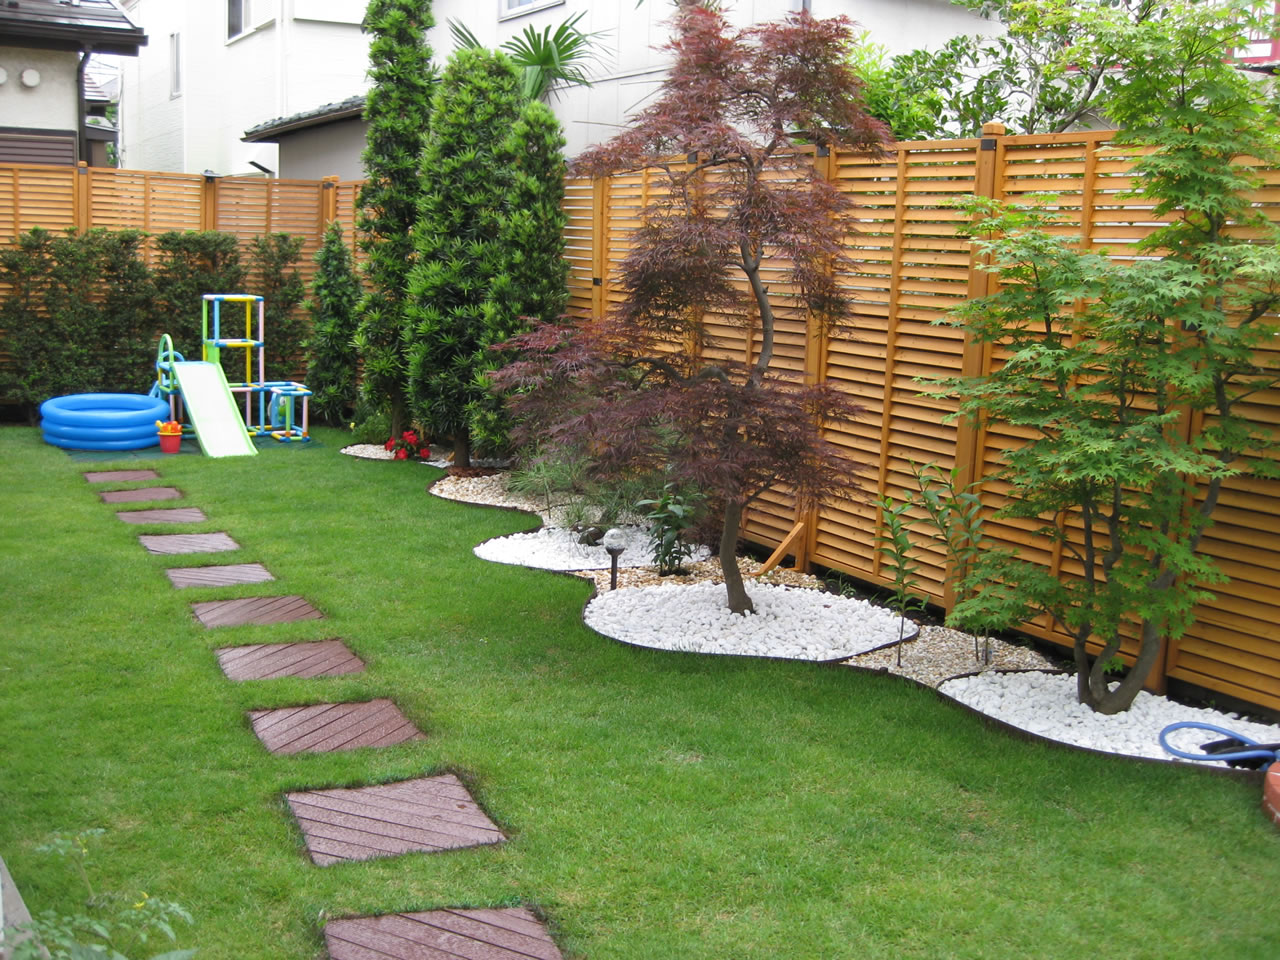
My home garden is my happy place, a vibrant mix of colors and textures. I’m constantly tweaking it, adding new plants and experimenting with different layouts. For some serious inspiration, I often browse stunning examples online, like those found in this amazing collection of home garden pictures , which always gives me fresh ideas. Then, I get back to work, making my own little slice of paradise even better.
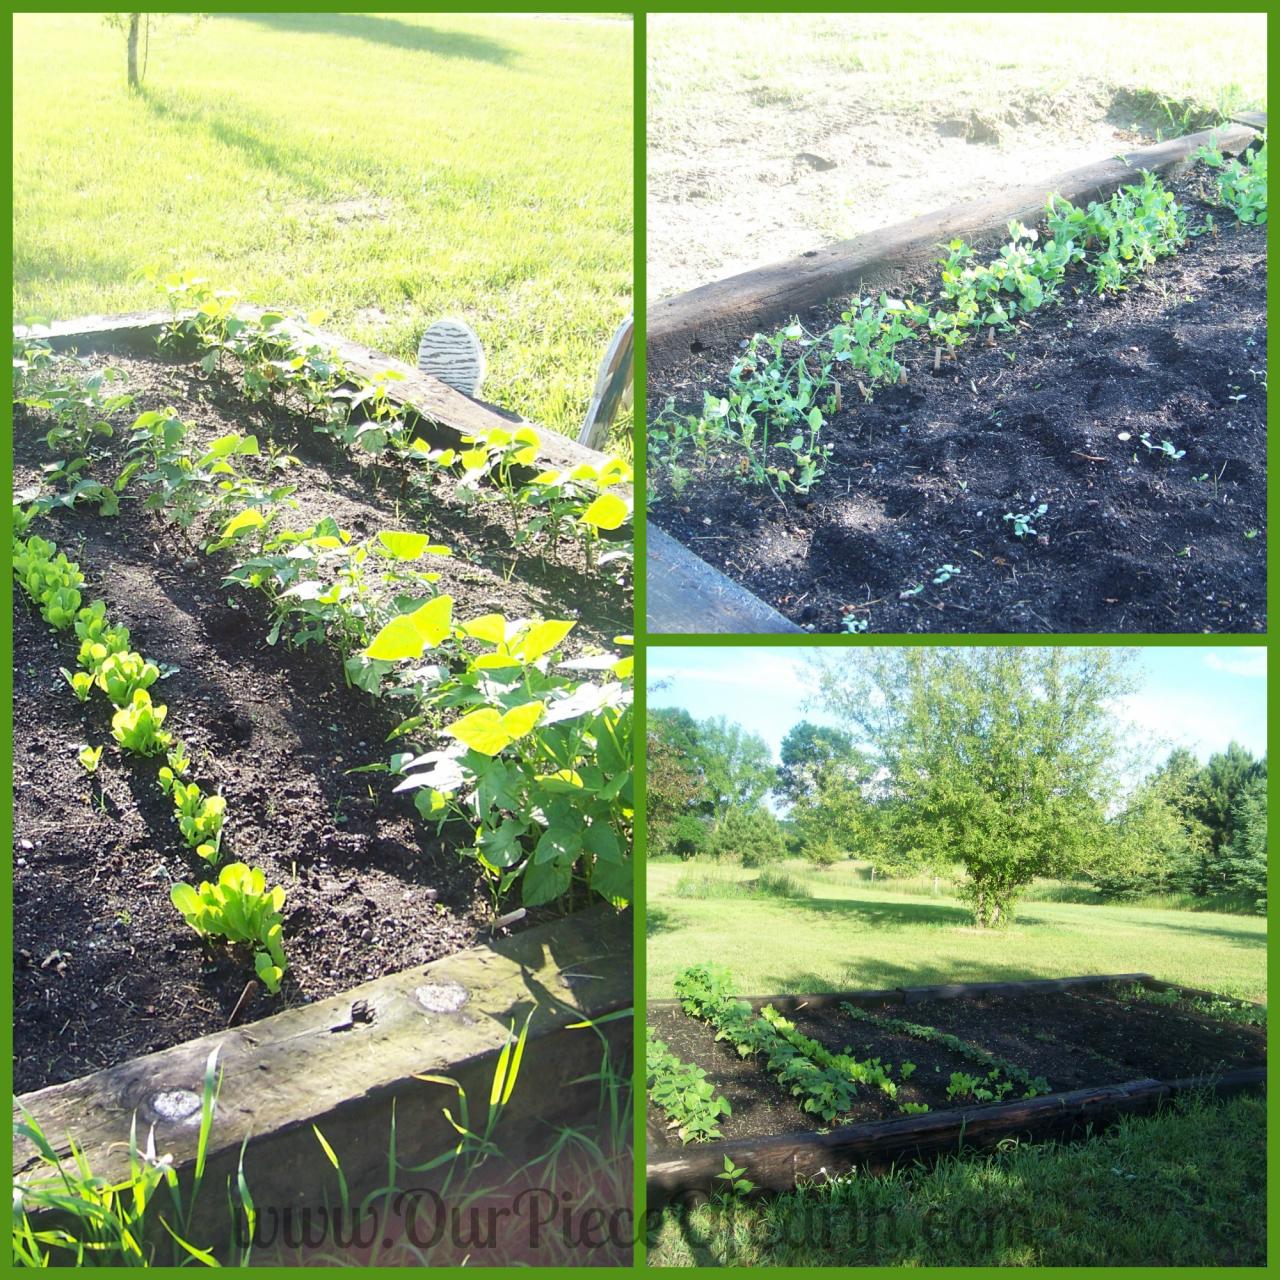
Raised Beds: Raised beds provide excellent drainage and soil control. They are easier to manage than in-ground gardens and are suitable for various plants. A well-constructed raised bed made from reclaimed wood could house a diverse mix of vegetables and herbs, providing easy access and improved soil conditions.
Selecting Plants for My Home Garden
Choosing the right plants is crucial for a thriving home garden. The success of your garden hinges on selecting varieties that suit your climate, soil conditions, and personal preferences. This involves considering factors like sunlight exposure, water needs, and the overall aesthetic you’re aiming for. Let’s delve into some key considerations for plant selection.
Heirloom Versus Hybrid Vegetable Varieties, My home garden
Heirloom and hybrid vegetable varieties offer distinct advantages and disadvantages. Heirloom varieties are open-pollinated, meaning they can reproduce true to type from seed, preserving their unique characteristics generation after generation. This often translates to unique flavors and textures, appealing to gardeners seeking a connection to traditional farming practices. However, heirlooms can be less disease-resistant and have lower yields compared to hybrids.
Hybrid varieties, on the other hand, are created through cross-breeding to enhance desirable traits such as disease resistance, yield, and uniformity. While often more productive, hybrids typically don’t produce true-to-type seeds, requiring annual purchases. The choice between heirloom and hybrid depends on your priorities – flavor and tradition versus yield and ease of cultivation.
Flowering Plants to Attract Pollinators
Pollinators are essential for a productive garden, and attracting them requires selecting the right flowering plants. Here are five excellent choices:
- Lavender (Lavandula): Known for its fragrant purple flowers and silvery foliage, lavender thrives in full sun and well-drained soil. It’s relatively low-maintenance and attracts bees and butterflies.
- Sunflowers (Helianthus annuus): These cheerful giants are a favorite among pollinators, offering abundant pollen and nectar. They prefer full sun and well-drained soil, requiring minimal care.
- Coneflowers (Echinacea): These daisy-like flowers come in various colors and are highly attractive to bees and butterflies. They tolerate drought conditions and prefer full sun to partial shade.
- Bee Balm (Monarda): With vibrant red, pink, or purple flowers, bee balm is a magnet for hummingbirds and bees. It thrives in moist soil and prefers full sun to partial shade.
- Zinnia (Zinnia elegans): These easy-to-grow annuals come in a wide range of colors and shapes. Zinnias are drought-tolerant and attract a variety of pollinators, thriving in full sun.
Vegetables Thriving in Partial Shade
Many vegetables can tolerate some shade, making them suitable for gardens with limited sunlight. Consider these options for your partially shaded areas:
- Lettuce
- Spinach
- Kale
- Swiss Chard
- Radishes
Maintaining My Home Garden
Maintaining a thriving home garden requires consistent effort and attention. From preparing the soil to choosing the right watering method and composting your organic waste, each step plays a crucial role in the overall health and productivity of your plants. Let’s delve into the essential practices for keeping your garden flourishing.
Soil Preparation: Testing, Amending, and Fertilizing
Healthy soil is the foundation of a successful garden. Before planting, it’s crucial to assess your soil’s composition and make necessary adjustments. A soil test, easily obtained from your local agricultural extension office or garden center, will reveal its pH level and nutrient content. This information guides you in amending the soil with organic matter, like compost or well-rotted manure, to improve its structure, drainage, and fertility.
Sandy soils benefit from the addition of organic matter to increase water retention, while clay soils need organic matter to improve drainage and aeration. After amending, incorporating a balanced fertilizer, following the package instructions, provides essential nutrients for optimal plant growth. For example, a soil test might reveal a need for more nitrogen for leafy greens or phosphorus for flowering plants.
Adjusting the soil’s pH might involve adding lime to raise it or sulfur to lower it.
Watering Methods: Drip Irrigation, Soaker Hoses, and Hand Watering
Efficient watering is vital for plant health. Three common methods are drip irrigation, soaker hoses, and hand watering. Drip irrigation delivers water directly to the roots, minimizing water waste and evaporation. It’s ideal for larger gardens or those with specific watering needs for different plants. Soaker hoses provide a gentler, more even watering, suitable for smaller gardens or raised beds.
Hand watering, while labor-intensive, allows for close monitoring of each plant’s moisture levels and can be beneficial for delicate seedlings or plants requiring targeted watering. The best method depends on the garden’s size, plant types, and available resources. For instance, a small herb garden might be easily managed with hand watering, while a large vegetable patch might benefit from the efficiency of drip irrigation.
Composting Organic Waste: A Step-by-Step Guide
Composting transforms organic kitchen and garden waste into nutrient-rich soil amendment. This reduces landfill waste and provides a sustainable way to enrich your garden.
- Gather Materials: Collect organic materials like vegetable scraps, coffee grounds, eggshells, yard clippings (avoid diseased plants), and shredded paper.
- Choose a Composting Method: Select a method suitable for your space and needs – a compost bin, a compost pile, or even a worm composting system.
- Layer Materials: Alternate “greens” (nitrogen-rich materials like grass clippings and food scraps) with “browns” (carbon-rich materials like dried leaves and twigs) in your chosen composting method. A good ratio is roughly equal parts.
- Maintain Moisture: Keep the compost consistently moist, like a wrung-out sponge. Regularly turning the pile helps maintain aeration and speed up decomposition.
- Turn Regularly: Turn the compost pile or bin every few weeks to aerate it and ensure even decomposition. This process also helps to break down materials more quickly.
- Monitor Temperature: The composting process generates heat. A temperature of around 130-160°F (54-71°C) indicates active decomposition. If the temperature is too low, add more greens; if it’s too high, add more browns.
- Harvest Compost: Once the compost is dark brown, crumbly, and earthy-smelling (typically after several months), it’s ready to use. This finished compost can then be incorporated into your garden soil.
Protecting My Home Garden
A thriving home garden requires more than just planting and watering; safeguarding your precious plants from pests, diseases, and harsh weather is crucial for a bountiful harvest. Protecting your garden investment involves a multi-pronged approach, combining proactive measures with responsive actions to ensure the health and longevity of your plants. This section will delve into practical strategies for organic pest and disease control, weather protection, and the advantages of companion planting.
Organic Pest and Disease Control
Organic pest and disease control focuses on preventative measures and environmentally friendly solutions to maintain a healthy garden ecosystem. Avoidance of harmful chemicals protects both the environment and your family. Effective strategies include regular garden inspection to catch problems early, promoting beneficial insects like ladybugs that prey on aphids, and employing natural deterrents such as neem oil or insecticidal soap.
- Regular Inspection: A weekly inspection allows for early detection of pests or diseases, enabling prompt intervention before widespread damage occurs. Look for signs of chewing, discoloration, or unusual growths on plants.
- Beneficial Insects: Attracting beneficial insects like ladybugs, lacewings, and praying mantises provides natural pest control. Planting flowers that attract these insects, such as dill or yarrow, can significantly reduce pest populations.
- Natural Deterrents: Neem oil, a natural pesticide derived from the neem tree, effectively controls a wide range of insects. Insecticidal soap, a mixture of water and potassium salts of fatty acids, is another effective organic option for controlling soft-bodied insects like aphids and mealybugs.
Protecting Plants from Extreme Weather
Extreme weather conditions, such as frost or intense heat, can severely damage or even kill plants. Planning ahead is crucial to minimize the impact of these events. This involves selecting appropriate plant varieties, employing protective measures, and adjusting watering schedules based on weather forecasts.
- Frost Protection: During frost warnings, covering vulnerable plants with frost cloth or row covers provides insulation and prevents damage. Watering plants thoroughly before a frost can also help protect them.
- Heat Protection: During heatwaves, providing shade for plants using shade cloth or strategically placing taller plants can help reduce the impact of intense sunlight. Mulching around plants helps retain soil moisture and regulate soil temperature.
- Water Management: Adjust watering schedules according to weather conditions. During periods of extreme heat, increase watering frequency, but avoid overwatering, which can lead to root rot.
Companion Planting Benefits and Examples
Companion planting involves strategically planting different plant species together to enhance growth, deter pests, and improve overall garden health. Certain plant combinations create synergistic effects, boosting yields and resilience.
- Basil and Tomatoes: Basil is known to repel tomato hornworms and other tomato pests, while tomatoes provide shade for basil, which prefers partial shade.
- Marigolds and Vegetables: Marigolds release compounds that repel nematodes and other soil-borne pests, protecting nearby vegetables.
- Beans and Corn: Beans fix nitrogen in the soil, benefiting corn plants, while corn provides support for climbing bean varieties.
Harvesting and Preserving My Home Garden’s Bounty
Bringing in the fruits (and vegetables!) of your labor is incredibly rewarding. Harvesting at the right time ensures peak flavor and nutritional value, while preserving your bounty extends its enjoyment far beyond the growing season. This section will guide you through the process, from knowing when to pick to keeping your produce fresh for months to come.
Summer Vegetable Garden Harvesting Schedule
Timing is crucial for optimal flavor and yield. Harvesting too early results in small, underdeveloped produce, while waiting too long can lead to tough, woody vegetables or fruit that’s past its prime. The following schedule provides a general guideline; specific timing may vary depending on your climate and variety of plant.
| Vegetable | Harvest Time | Signs of Readiness |
|---|---|---|
| Beans (Bush) | 55-65 days after planting | Pods are plump and well-filled, but still tender. |
| Cucumbers | 50-70 days after planting | Fruits are firm and have reached desired size. |
| Tomatoes | 60-80 days after planting (varies greatly by variety) | Fruits are fully colored and slightly soft to the touch. |
| Zucchini | 50-60 days after planting | Fruits are young, tender, and 6-8 inches long. |
| Peppers | 70-80 days after planting | Fruits are fully colored and firm. |
Preserving Harvested Produce
Preserving your harvest allows you to enjoy the delicious flavors of summer long after the growing season ends. Several methods exist, each with its own advantages and disadvantages.
- Canning: This method involves processing food in a boiling water bath or pressure canner to destroy harmful bacteria and create an airtight seal, preserving it for a year or more. Canning is ideal for high-acid foods like tomatoes and pickles, but requires careful attention to safety procedures to avoid botulism.
- Freezing: Freezing is a simple and effective way to preserve many fruits and vegetables. Blanching (briefly boiling) vegetables before freezing helps retain their color, texture, and nutrients. Properly frozen produce can last for several months.
- Drying: Drying removes moisture, inhibiting the growth of microorganisms. This method is suitable for fruits and some vegetables. Air drying, sun drying, and dehydrators are all viable options. Dried produce can last for several months to a year, depending on storage conditions.
Creating a Tomato Plant Infographic
A visually appealing infographic can effectively communicate the journey of a tomato plant, from seed to harvest.The infographic should be divided into sections, each representing a key stage in the tomato plant’s life cycle. A timeline could run horizontally across the bottom, indicating the time frame for each stage. Use clear, concise language and high-quality images or illustrations.
Section 1: Planting the Seed This section would show a seed being sown in a small pot or directly into the ground, along with a brief description of the ideal soil conditions and planting depth. An image could depict a hand gently placing a seed into the soil. Section 2: Seedling Growth This section shows the emergence of the seedling, highlighting the importance of sunlight and watering.
An image could show a young tomato plant with its first true leaves. Section 3: Transplanting This section depicts the careful transfer of the seedling to a larger pot or the garden bed, emphasizing the need for proper spacing and support. An image could illustrate a gardener gently removing a seedling from its pot. Section 4: Plant Growth and Care This section illustrates the growth of the tomato plant, highlighting the importance of staking or caging, regular watering, and fertilization.
Images could show a mature tomato plant with flowers and developing fruits, along with examples of staking and watering techniques. Section 5: Harvesting This section displays ripe tomatoes ready for harvest, with tips on how to identify ripeness and proper harvesting techniques. An image could show a gardener carefully picking ripe red tomatoes from the vine.